How to Clean and Maintain a Frequency Converter
As a key piece of equipment in industrial automation, the cleaning and maintenance of frequency converters directly impact their operational stability and service life. Below are detailed cleaning and maintenance methods, along with important precautions:

1. Preparation for Cleaning and Maintenance
1.1 Safety Precautions
- Disconnect the frequency converter’s main power and control power supplies, ensuring the power indicator light is off.
- Wait for capacitors to discharge (typically 10–15 minutes; high-power models may require longer). Confirm discharge is complete by measuring the DC bus voltage, which should drop below 36V.
- Wear insulated gloves and anti-static wristbands, and use insulated tools (e.g., insulated screwdrivers) to avoid static electricity or electric shock risks.
1.2 Tool Preparation
- Cleaning tools: Soft-bristled brush (lint-free), high-pressure air gun (with dry, oil-free compressed air), industrial vacuum cleaner, anhydrous alcohol (or specialized electronic cleaner), and dust-free cloths.
- Inspection tools: Multimeter (for voltage testing) and torque wrench (to tighten screws to specified levels, preventing over-tightening or loosening).
2. Cleaning Steps
2.1 External Cleaning
- Wipe the inverter’s casing, control panel, and heat dissipation grilles with a dust-free cloth dampened with a small amount of anhydrous alcohol to remove surface oil and dust.
- For stubborn dust in grille gaps, use a soft-bristled brush to loosen it, then vacuum away residues.
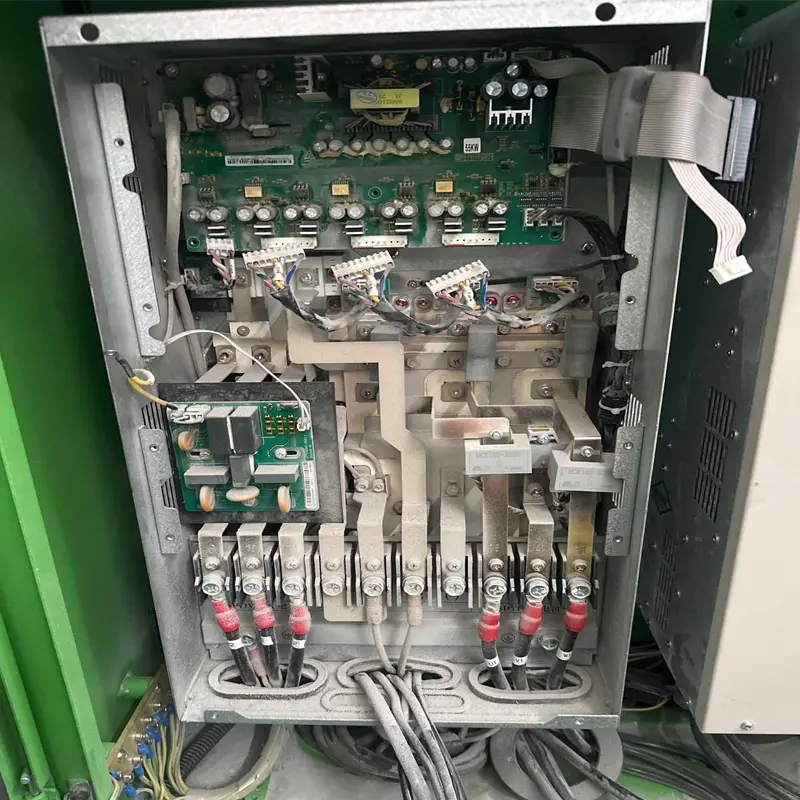
2.2 Internal Cleaning (Requires Casing Removal, for Cabinet or Detachable Models)
-
Cooling Fan and Filter:
- Remove the fan cover and use a high-pressure air gun to blow dust from the fan blades and filter (direct air from inside to outside to avoid pushing dust into internal circuits). Filters can be removed, rinsed with clean water, and reinstalled only after fully drying.
- Check for fan noise or jamming; replace immediately if faulty.
-
Circuit Boards and Components:
- Use a high-pressure air gun (set to low pressure to avoid damaging parts) to blow dust off circuit boards, focusing on dense areas like resistors, capacitors, and chips.
- For oil or stubborn stains, gently wipe with a dust-free cloth dampened with a small amount of anhydrous alcohol (avoid letting alcohol seep into components). Wait for alcohol to fully evaporate before powering on.
-
Heat Sinks:
- Dust buildup in heat sink gaps impairs cooling. Use a soft brush or air gun to clear debris, ensuring unobstructed heat dissipation.
3. Maintenance and Inspection Checklist
3.1 Electrical Connections
- Check main circuit terminals (power input, motor output) and control circuit terminals for loose screws. Tighten to the manufacturer’s specified torque using a torque wrench (refer to the inverter manual).
- Inspect cable connectors for oxidation or burn marks; polish or replace damaged connectors.
3.2 Component Condition
- Capacitors: Check electrolytic capacitors for bulging, leakage, or deformation. Replace with same-specification capacitors (matching voltage and capacity) if damaged.
- Relays and Contactors: Inspect contacts for oxidation or sticking, and ensure smooth operation. Replace if malfunctioning.
- Circuit Boards: Look for solder defects, corrosion, or burn marks. Consult professionals for repairs if issues are found.
3.3 Cooling System
- Verify cooling fans run at normal speed with no unusual noise, and ensure air ducts are unblocked.
- For fan-equipped models, check fan power supply functionality and thermostat sensitivity.
3.4 Parameter and Function Testing
- After powering on, confirm the control panel displays correctly and buttons respond properly.
- During operation, listen for abnormal noises, measure output voltage balance, and verify that overload, overcurrent, and other protection functions work as intended.
4. Daily Maintenance Tips
- Environment Control: Keep the inverter in a clean, dry area (humidity ≤ 90% with no condensation) and maintain temperatures between -10°C and 40°C. Avoid direct sunlight, heat sources, dust, corrosive gases, and vibration.
- Cleaning Frequency: Schedule cleanings based on dust levels—every 3–6 months for standard workshops; monthly for dusty environments (e.g., cement plants, woodworking shops).
- Record-Keeping: Document cleaning details, inspection results, replaced parts, and dates to track equipment performance over time.
Following these steps reduces failures caused by dust, poor contact, or inadequate cooling, extending the inverter’s lifespan. For complex issues (e.g., circuit board damage), contact professional technicians for repairs.

