
09/02/2025
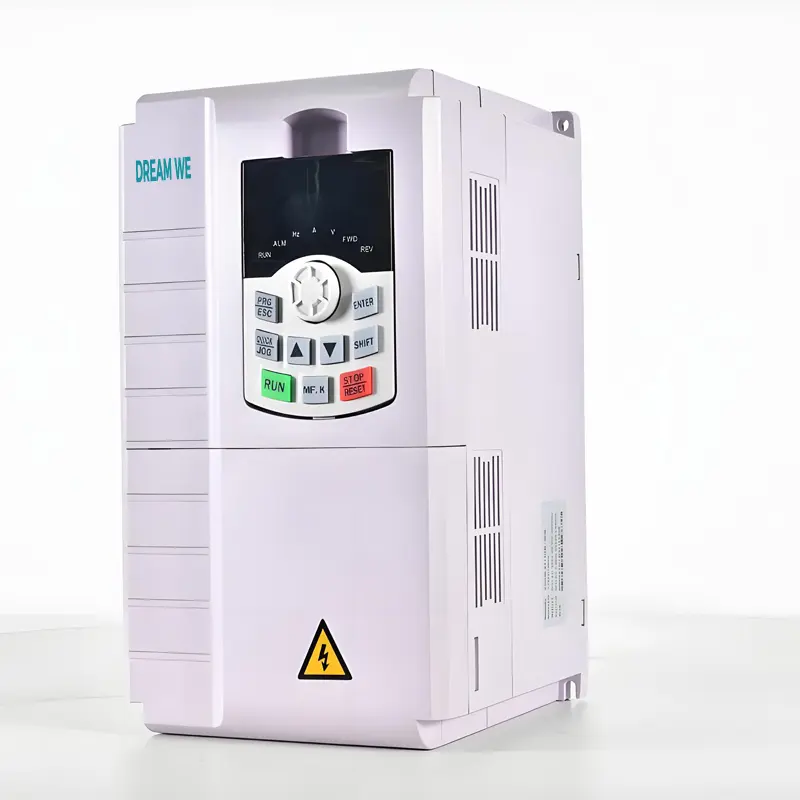
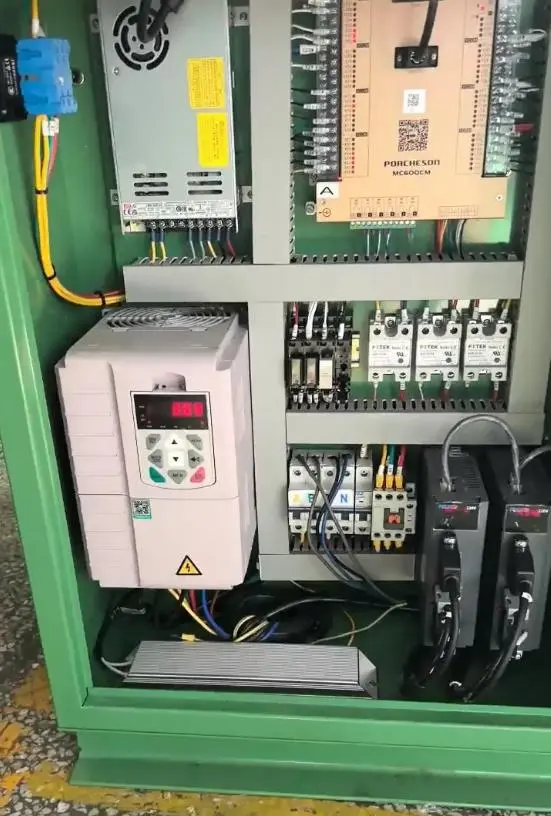
What is a Frequency Converter? A frequency converter is a device that uses power electronics to adjust the frequency of a motor’s operating power supply, enabling precise control of the motor’s speed. Its core function is converting fixed-frequency AC power (typically 50Hz or 60Hz from the grid) into adjustable-frequency AC power. By varying the frequency, it regulates motor speed while also saving energy, protecting the motor, and optimizing load performance. The working process of a frequency converter involves three key stages: rectification (converting AC to DC), filtering (stabilizing DC voltage), and inversion (converting DC back to adjustable-frequency AC). It uses a control circuit to receive external commands (e.g., speed settings) and dynamically adjust output frequency. Compared to traditional mechanical speed regulation methods (such as gate or valve controls), frequency converters offer smoother speed adjustments, lower energy consumption, and reduced equipment wear—making them widely used in industrial and commercial settings. 3 Applications in Industrial Manufacturing Machine Tool Spindle Drives In metalworking machines (e.g., lathes, milling machines, grinders), spindle speed directly impacts machining precision and efficiency. Traditional machines rely on gear shifts for speed adjustments, which cause operational shocks and offer limited speed options. Frequency converter-equipped machines, however, enable stepless speed regulation (0–3000r/min or higher) by adjusting the spindle motor frequency: high speeds for roughing to boost efficiency, and low speeds for precision grinding to ensure accuracy. Additionally, frequency converters quickly respond to speed changes (e.g., instant shifts from low to high speed), reducing downtime during tool changes. Their overload protection also prevents motor burnout from excessive loads, enhancing machine stability and lifespan. Conveyor Line Speed Control Factory material conveyors (e.g., food packaging lines, automotive assembly lines) require flexible speed adjustments to match upstream and downstream processes. For instance, in a canned food production line, if filling speeds exceed capping speeds,...
Details
09/02/2025
How to Quickly Master the Core Technology of Frequency Converters I. Break Through from Underlying Principles: Grasp the Core Logic of “Current Conversion + Speed Regulation” Disassemble Core Circuit Modules Rectifier circuit: Focus on understanding how diode/IGBT rectifier bridges convert alternating current (AC) to direct current (DC). Remember the quick calculation: “Three-phase rectified output voltage ≈ 1.35 × input voltage”. Inverter circuit: Master the three-phase bridge inverter structure composed of 6 IGBTs, and understand how “Pulse Width Modulation (PWM)” generates AC with adjustable frequency and voltage by altering the switching frequency. Control circuit: Focus on the role of the MCU (Micro Control Unit) — receiving external signals (e.g., speed settings), calculating, and outputting PWM drive signals to achieve precise motor control. Thoroughly Understand the Speed Regulation Mathematical Model Keep in mind the asynchronous motor speed formula: n = 60f(1-s)/p (n = speed, f = frequency, s = slip ratio, p = number of pole pairs). The formula intuitively shows that changing frequency (f) is the core of speed regulation, and voltage must change proportionally with frequency (V/F ratio) to avoid motor magnetic circuit saturation. II. Focus on 3 Control Methods: A Technical Ladder from Basic to Advanced V/F Control (Must-Master for Beginners) Core logic: Maintain a constant voltage-to-frequency ratio to achieve “boost compensation at low frequencies” (solving insufficient starting torque). Quick application: Note that variable torque loads like fans and water pumps favor V/F control. During debugging, focus on setting the “V/F curve” (linear/square type) and “torque boost” parameters. Vector Control (Advanced Core) Core logic: Through coordinate transformation (Clarke-Park transformation), simplify the complex three-phase motor model into a “field current + torque current” DC motor model, enabling independent control of speed and torque. Key parameters: Master debugging techniques for “motor parameter self-learning” (requires no-load/load learning) and “speed loop PI regulator”...
Details

09/01/2025
How to Improve Solar Panels’ Efficiency in Utilizing Scattered Light? To enhance solar panels’ efficiency in harnessing scattered light, improvements must address material design, structural optimization, and installation methods—all tailored to the unique traits of scattered light (e.g., light on cloudy or overcast days), such as dispersed direction, low intensity, and a spectral distribution distinct from direct sunlight. Below are specific strategies: 1. Optimize Panel Materials and Coatings Use broad-spectrum responsive materials: Traditional solar cells excel at absorbing specific light wavelengths, but scattered light has a more dispersed spectrum. Perovskite solar cells (which absorb light from visible to near-infrared ranges) or multi-junction cells (stacked with diverse semiconductors to cover more scattered light wavelengths) better capture this dispersed spectrum. Add anti-reflective coatings (ARCs): Applying multi-layer anti-reflective coatings to panel surfaces reduces scattered light reflection. For example, nanostructured coatings (e.g., silicon dioxide nanoparticles) use light-trapping effects to let more scattered light penetrate the cell for absorption. 2. Enhance Panel Structural Design Adopt textured surfaces: Creating micron-scale textures (such as pyramid patterns) on cell surfaces via etching or laser processing causes scattered light to reflect multiple times, lengthening its path inside the cell and boosting absorption rates. Use transparent backsheets and lightweight encapsulation: Traditional opaque backsheets block some scattered light. Replacing them with transparent backsheets (e.g., glass or clear polymers) and thinning encapsulation materials allows more scattered light to enter from the back or sides. Flexible and bendable designs: Flexible solar cells (e.g., thin-film cells) can conform to curved surfaces (e.g., building arches, car roofs), expanding their angle of reception for scattered light from various directions and reducing losses from fixed angles. 3. Refine Installation Angles and Layouts Dynamic tracking systems: Though scattered light spreads widely, dual-axis tracking systems (adjusting with the sun’s azimuth and altitude) keep panels aligned with the brightest areas of scattered light (e.g., bright sky regions on...
Details
09/01/2025
How Efficient Are Solar Panels on Cloudy Days? The energy generation efficiency of solar panels on cloudy days is not a fixed figure. It primarily depends on factors like cloud thickness and light intensity, typically ranging from 30% to 70% of their efficiency under direct sunlight on sunny days. Specifically: In partly cloudy conditions (where clouds are thin and some sunlight still penetrates), efficiency may reach 50% to 70% of that on sunny days. In heavily overcast weather (with thick clouds and dim light), efficiency drops further, potentially falling to just 30% to 50% of sunny-day levels. In extremely overcast conditions or during late-afternoon cloudy hours, efficiency may even dip below 30%. This is because light on cloudy days is dominated by scattered light, where the number and energy of photons are significantly lower than in direct sunlight. However, the semiconductor materials in solar panels can still capture some scattered light and convert it into electricity—though conversion efficiency is noticeably reduced. Actual efficiency is also influenced by factors such as panel material (e.g., monocrystalline vs. polycrystalline silicon) and installation angle.
Details

09/01/2025
Do Solar Panels Need Direct Sunlight? Solar panels don’t require direct sunlight to function, but their energy production efficiency is heavily influenced by light conditions. Below is an explanation of how they work and how different lighting scenarios impact their performance: I. Core Working Principle The key to solar panel power generation is the photovoltaic effect in semiconductor materials (e.g., silicon): When photons (the fundamental particles of light) hit the semiconductor surface, they knock electrons loose from their atomic bonds, creating usable electric current. The critical factors here are the energy and quantity of photons—not whether the light is “direct.” II. Energy Production Under Different Lighting Conditions In direct sunlightHere, photons are most energetic and abundant, so solar panels operate at peak efficiency. This is their optimal working state. In scattered light (overcast days, cloudy weather, or under tree shade)Even without direct sunlight, scattered light (from atmospheric reflection or diffusion) still contains plenty of photons. Panels can generate electricity in such conditions, though efficiency drops—typically to 30%-70% of direct sunlight levels, depending on the intensity of scattered light. In low-light scenarios (dawn, dusk, or indoor lighting)Panels can produce small amounts of electricity in dim light, but efficiency is extremely low. This is only practical for low-power devices like calculators or small sensors. III. Optimized Designs for Real-World Use To adapt to non-direct light, solar panels often include: High-sensitivity semiconductors to better capture scattered light; Solar tracking systems (in large-scale power plants) that align panels with the sun in real time, reducing shading and maximizing direct light usage. Summary Solar panels don’t rely on strict direct sunlight, but light intensity and angle directly affect their efficiency. They perform best in direct sunlight, work steadily in scattered light, and only meet minimal power needs in low light. This versatility allows them to function in...
Details
08/29/2025
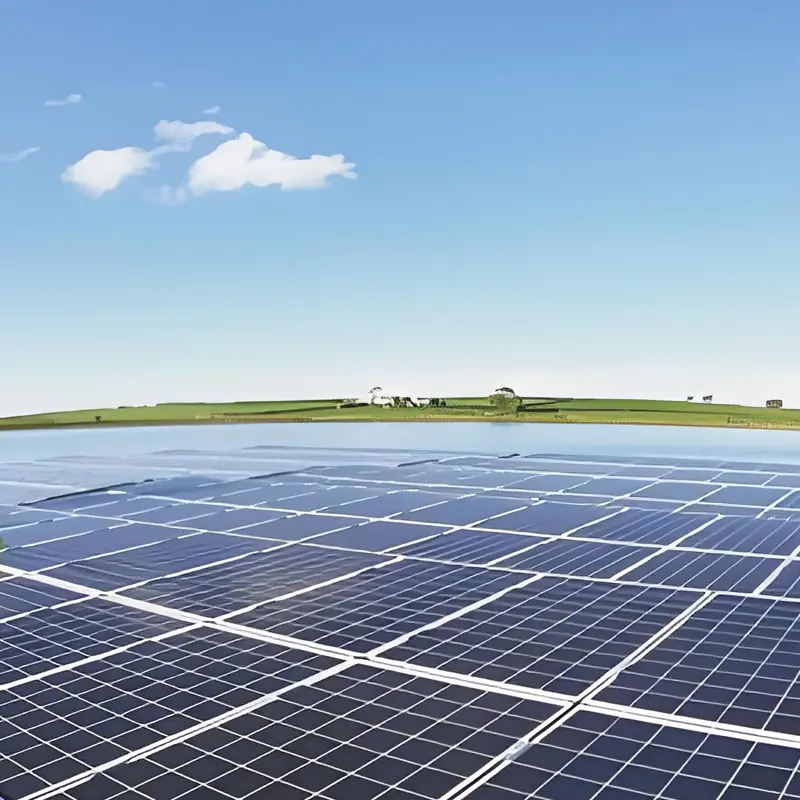
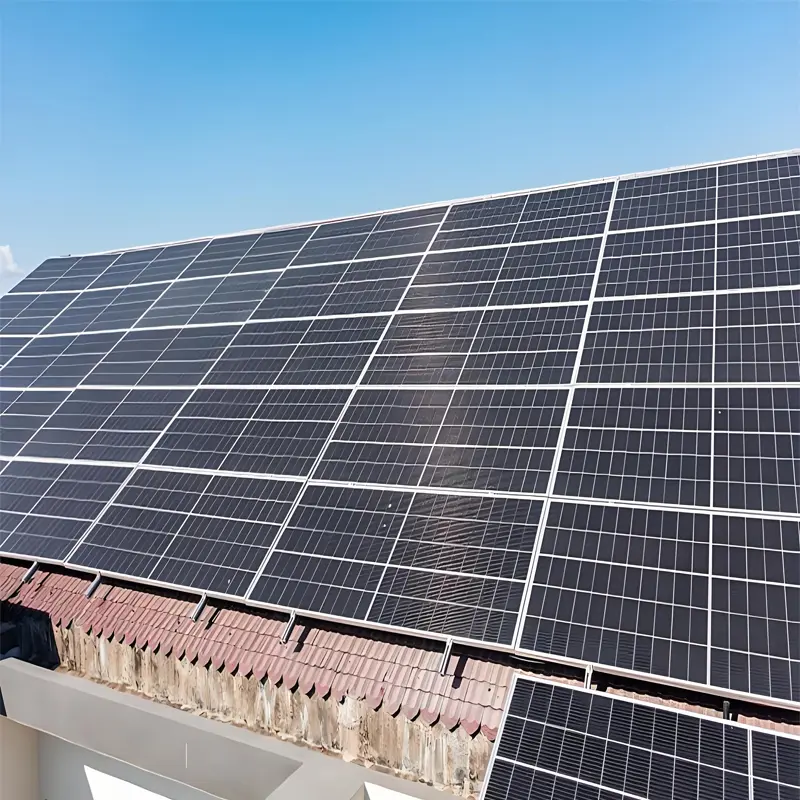
Applications and Use Cases for Solar Panels As a device that converts solar energy into electrical energy, solar panels have a wide range of application scenarios. Below are some of the most common ones: 1. Power Supply Sector Solar Power Plants: Large-scale solar photovoltaic (PV) power plants consist of numerous solar PV panels integrated into a complete solar power generation system. These plants can be connected to energy storage systems and power grids, providing reliable electricity for cities and regions. Rooftop PV Systems: PV panels are installed on the rooftops of residential and commercial buildings to harness solar energy for electricity generation. Such systems can meet part or all of a building’s electricity needs. An inverter converts the direct current (DC) produced by the panels into alternating current (AC) for indoor use, and any excess electricity can be fed back into the power grid. 2. Lighting Sector Outdoor Lighting Systems: Solar wall lamps, lawn lamps, and garden lamps are equipped with low-power solar panels. Using monocrystalline silicon cells, these lamps can generate electricity even in low-light conditions, fulfilling outdoor landscape lighting requirements. They also feature waterproof and moisture-resistant properties, making them suitable for long-term outdoor use. Portable Lighting Devices: Products like solar light strings and camping lights adopt an ultra-thin design and can be paired with portable energy storage devices. They provide stable lighting for activities such as camping and hiking, with a battery life of over 72 hours. 3. Transportation Sector Vehicle Power Sources: Some vessels—including sightseeing boats, fishing boats, and sailboats—use solar panels as a power source to reduce dependence on fossil fuels. Additionally, there are photovoltaic unmanned vehicles and photovoltaic rail transit systems, which leverage solar energy to provide clean, renewable energy solutions for vehicle operation. Power for Transportation Facilities: Solar panels can power photovoltaic bus stops,...
Details
08/28/2025
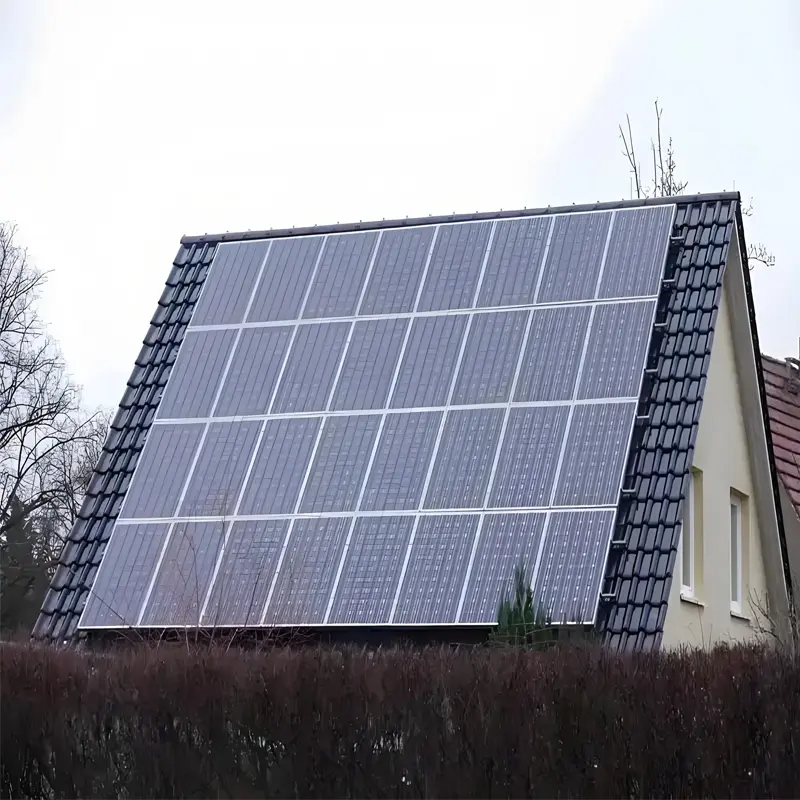
Residential & Commercial Solar Panels Installation Conditions Evaluation Guidelines The installation performance and power generation efficiency of solar panels largely depend on the scientific evaluation of pre-installation conditions. This guide systematically breaks down key evaluation points across five core dimensions—site conditions, solar resource availability, technical compatibility, policy compliance, and cost-benefit analysis—providing a practical evaluation framework for individual users (residential properties) and enterprise users (industrial/commercial factories, industrial parks). I. Site Condition Evaluation: The Foundation for Determining “Installability” The site serves as the carrier for solar energy systems. Evaluations should be tailored to three common installation scenarios—rooftop, ground, and wall-mounted—with a focus on structural safety, space usability, and environmental adaptability. 1. Rooftop Installation Scenario (Most Mainstream, for Residences and Factories) Rooftops are the most common installation sites in urban and suburban areas. Key evaluation indicators include load-bearing capacity, orientation and tilt angle, and structural integrity: Evaluation Dimension Core Requirements Testing Methods Structural Load-Bearing Concrete rooftops: ≥200kg/㎡ (including the weight of modules, brackets, and foundations); Color steel tile rooftops: ≥150kg/㎡ 1. Retrieve architectural drawings (to review the rooftop’s designed load capacity); 2. Hire professional institutions for on-site testing (e.g., core drilling) Rooftop Orientation Priority is given to due south (in the Northern Hemisphere), with an allowable deviation of ±15°; East/west orientations are secondary (resulting in a 15%-30% drop in power generation efficiency) 1. Measure using a mobile phone compass app; 2. Mark the direction using satellite maps (e.g., Google Earth) Rooftop Tilt Angle The optimal tilt angle equals the local latitude ±5° (use “-” if the latitude is >30°, and “+” if the latitude is <30°); Flat rooftops require additional brackets for angle adjustment 1. On-site measurement with an inclinometer (for sloped rooftops); 2. Calculate the theoretical optimal value based on the local latitude Structural Integrity The rooftop should be free of cracks, water leakage,...
Details
08/27/2025
Advantages and Disadvantages of Solar Panels with Different Specifications: Selection Should Match Scenario Requirements The “specifications” of solar panels are mainly categorized by size, power, cell type, and voltage/current parameters. Products with different specifications vary significantly in power generation efficiency, applicable scenarios, installation costs, and durability. When selecting a solar panel, you must align your choice with core needs—such as the usage scenario (e.g., household rooftops, industrial/commercial power stations, outdoor portable devices), space constraints, and budget—rather than simply pursuing “high specifications.” Below is a detailed breakdown of the advantages, disadvantages, and applicable scenarios of various solar panels based on mainstream specification classifications. I. Classification by Power Specifications: Low-Power vs. Medium-Power vs. High-Power Power is a core performance indicator of solar panels (unit: Watts/W), directly determining the amount of electricity generated per unit time. Products with different power specifications cater to different electricity demand scenarios. Power Category Common Range Advantages Disadvantages Applicable Scenarios Low-Power Solar Panels 10W–100W 1. Compact and lightweight (single panel weight: 1–5kg), making them easy to carry and install;2. Low cost (price per watt: approx. ¥1.5–2), ideal for low-budget or small-capacity electricity needs;3. Minimal space requirements, allowing flexible use with small devices (e.g., streetlights, power banks). 1. Low power output, unable to support high-power loads (e.g., household air conditioners, industrial equipment);2. To meet large electricity demands, multiple panels must be connected in series/parallel, increasing wiring complexity and failure risk. 1. Outdoor portable devices (e.g., solar power banks for camping, low-power supply for RVs);2. Small off-grid systems (e.g., rural household lighting, power for monitoring equipment);3. Distributed small-scale scenarios (e.g., garden streetlights, small balcony solar setups). Medium-Power Solar Panels 100W–300W 1. Moderate power output: A single panel can power small-to-medium loads (e.g., household refrigerators, washing machines);2. High cost-effectiveness (price per watt: approx. ¥1.2–1.8), balancing cost and power generation needs;3. Flexible...
Details
08/27/2025
How to Improve the Power Generation Efficiency of Solar Panels? The power generation efficiency of solar panels directly impacts their electricity output and return on investment. The core optimization logic centers on three key directions: maximizing effective sunlight absorption, reducing energy loss, and adapting to environmental conditions. Below are specific, actionable methods covering installation design, daily maintenance, technical selection, and other dimensions—catering to both household users and commercial project needs. I. Optimize Installation Design: Help Solar Panels “Capture More Sunlight” The installation phase establishes the foundation for power generation efficiency. It requires precise alignment with on-site sunlight conditions to minimize wasted sunlight. Precisely Set Installation Angle and Orientation Orientation Selection: In the Northern Hemisphere, solar panels should be prioritized to face due south (a ±5° deviation is acceptable) to ensure direct exposure to intense midday sunlight; in the Southern Hemisphere, panels should face due north. If building structure limits this (e.g., the rooftop does not face south), use professional software (such as PVsyst) to simulate power generation across different orientations and select the optimal option. For example, southeast or southwest orientations—while reducing power generation by 10%–15%—can balance morning and evening peak electricity demand. Angle Calculation: The installation angle should match the local latitude: For regions with a latitude ≤25°, the angle ≈ local latitude; For regions with a latitude of 25°–40°, the angle ≈ local latitude + 5°–10°; For regions with a latitude >40°, the angle ≈ local latitude + 10°–15°.For instance, in Beijing (39°N), the optimal angle is approximately 45°–50°—this maximizes sunlight absorption in spring and autumn while preventing snow accumulation in winter. Reserve Proper Spacing to Avoid Shading Calculate the spacing between adjacent solar panels (or arrays) based on the solar altitude angle at noon on the winter solstice (when the sun is lowest, creating the highest shading risk). Use the formula: Spacing...
Details
08/27/2025
The Relationship Between House Area and the Number of Solar Panels The relationship between house area and the number of solar panels is not a direct linear correlation. It primarily depends on three key factors: available rooftop installation area, solar panel specifications (area/power), and household electricity demand—while also being influenced by practical factors such as rooftop orientation, sunlight conditions, and shading. Below is a detailed explanation from three perspectives: core logic, calculation methods, and practical constraints. I. Core Understanding: Ignore “Total House Area” — Focus on “Available Rooftop Area” Many people mistakenly assume that “a 100-square-meter house requires XX solar panels.” However, total house area (e.g., usable floor area or gross floor area) has no direct link to solar panel installation—solar panels are only installed on rooftops (or open areas like balconies and courtyards). Additionally, rooftops must exclude obstacles such as chimneys, skylights, vents, and parapet walls; only the “effective area where solar panels can be laid” is relevant. Under typical circumstances: Ordinary mid-rise residential buildings (6–11 floors): The available rooftop area is approximately 20–50 square meters (depending on the apartment type and rooftop structure—for example, only the south-facing slope of a pitched roof is usable, while flat rooftops offer more usable space). Villas/self-built houses: The available rooftop area is roughly 50–150 square meters (rooftop structures are more flexible, and some properties can accommodate photovoltaic sheds). High-rise residential buildings: If the rooftop is a shared public area, installation may not be permitted. In such cases, consider balconies (only south-facing balconies are usable, with an area of about 3–8 square meters) or community centralized photovoltaic systems. II. Solar Panel Specifications: Determining “How Many Panels Fit in 1 Square Meter” Solar panels of different models vary significantly in terms of single-panel area and power, which directly affects “how many panels can be installed per unit area.” The...
Details
08/27/2025
Factors Affecting the Conversion Efficiency of Solar Panels The conversion efficiency of solar panels is a core indicator for measuring their ability to convert sunlight into electrical energy. Its value is jointly influenced by four major categories of factors: material properties, external environment, structural design, and usage wear. The specific mechanism and extent of impact of each category are as follows: I. Core Influencing Factor: Material Properties (Determining the Efficiency Ceiling) The core of a solar cell relies on the “photovoltaic effect”, and the physical and chemical properties of materials directly determine the upper limit of this effect’s efficiency—making them the fundamental factor affecting conversion efficiency. Material Type Key Characteristics Impact on Conversion Efficiency Typical Efficiency Range (Lab/Mass Production) Monocrystalline Silicon Complete crystal structure, long carrier lifetime It has strong light absorption capacity and low electron transmission loss, resulting in a high efficiency ceiling. However, it requires high material purity, which leads to higher costs. 26%-28% / 23%-25% Polycrystalline Silicon Multiple crystal grains, presence of grain boundary defects Grain boundaries cause electron recombination loss, so its efficiency is lower than that of monocrystalline silicon. Nevertheless, it has low costs and mature mass production processes. 23%-25% / 20%-22% Thin-Film Materials (e.g., Cadmium Telluride (CdTe), Perovskite) Tunable bandgap, thin and lightweight – Cadmium Telluride (CdTe): Its bandgap matches the solar spectrum, and it has a high light absorption coefficient (a 1μm thickness can absorb 90% of sunlight). Its mass production efficiency is close to that of polycrystalline silicon.– Perovskite: It has a tunable bandgap and extremely low preparation costs. Its laboratory efficiency has caught up with that of monocrystalline silicon, but it has poor stability (vulnerable to water and heat). Perovskite: 31%+ (tandem)/No large-scale mass production; CdTe: 22% / 18%-20% Other New Materials (e.g., Gallium Arsenide (GaAs)) Direct bandgap, high-temperature resistance It has extremely...
Details
08/27/2025
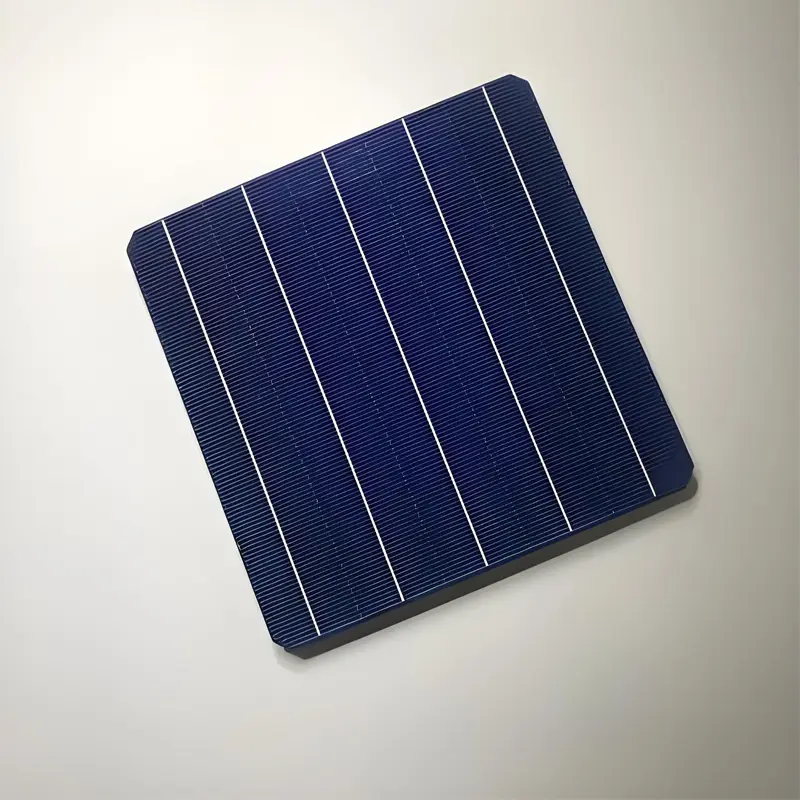
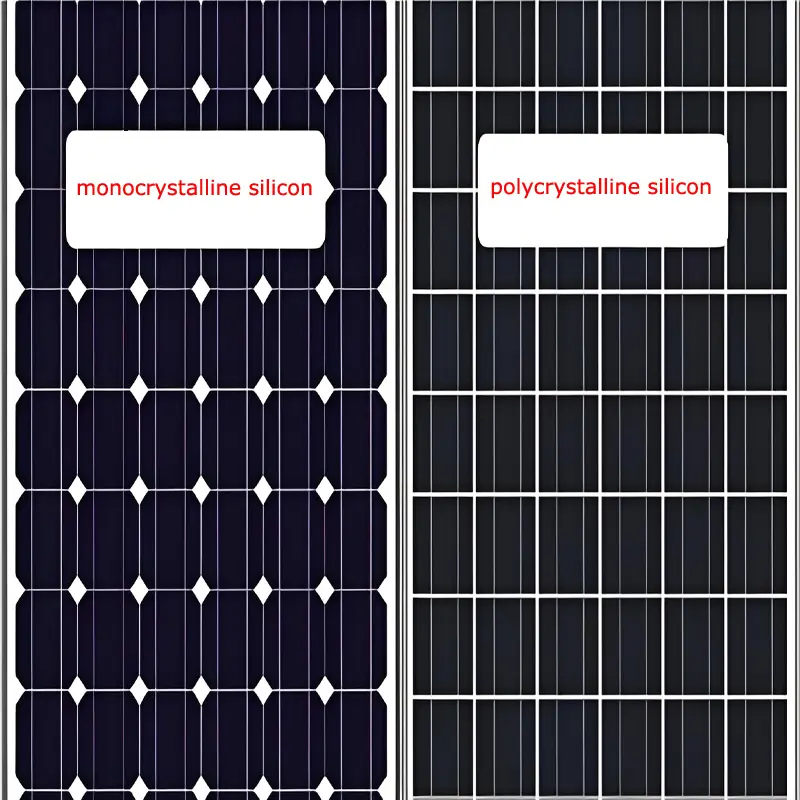
What are the types of solar panels? Solar panels are primarily categorized into three main types based on their materials: silicon-based, thin-film, and organic. Below is a detailed breakdown of each type: Silicon-based Solar Panels: Monocrystalline Silicon PV Panels: These panels are constructed from a single silicon crystal, featuring a fully intact lattice structure. With mature manufacturing processes, they boast relatively high conversion efficiency—typically ranging from 15% to 25%—alongside strong stability and a long lifespan. Their dark blue appearance makes them ideal for large-scale solar power plants and commercial projects, though they come with a higher cost. Polycrystalline Silicon PV Panels: Fabricated from polycrystalline silicon wafers, these panels have a relatively imperfect lattice structure. They benefit from simpler manufacturing processes and lower costs, with conversion efficiency between 12% and 18% and reliable stability. Their light blue color makes them a common choice for residential installations and small-scale commercial applications. Thin-film Solar Panels: Copper Indium Gallium Selenide (CIGS) PV Panels: Produced using non-silicon materials (copper, indium, gallium, and selenium), these panels are flexible and lightweight, with low material costs. Their conversion efficiency usually falls between 7% and 13%, making them suitable for flexible devices and building-integrated applications (e.g., exterior walls, rooftops). Perovskite PV Panels: An emerging type of photovoltaic module, these panels are based on perovskite materials. Their conversion efficiency surpasses that of traditional silicon-based PV modules, with a theoretical efficiency of over 30%. Available in dark red or brown, they are easy to shape and adaptable to diverse design requirements, often used in high-end commercial and industrial settings. Cadmium Telluride (CdTe) PV Panels: These panels offer the same low-cost advantage as polycrystalline cells and stand out for having the lowest carbon footprint, water consumption, and energy payback time among all solar panel types. However, due to the toxicity of...
Details